Fl STUDIO
FL Studio Tutorial: What You Need To Know & Getting Started.
If you're looking for an FL Studio tutorial to get started
making music with this powerful DAW, then you're in the right place!
So where do we begin?
With what seems like a million buttons, getting started can seem intimidating.
But there’s no need to fear! This article will guide you through the menus and tools in FL Studio’s interface, so you can learn everything you need to get started without opening up the manual!
The menu bar contains many useful functions and panels. You will find yourself using these windows frequently, so be sure to become familiar with the features and their locations.
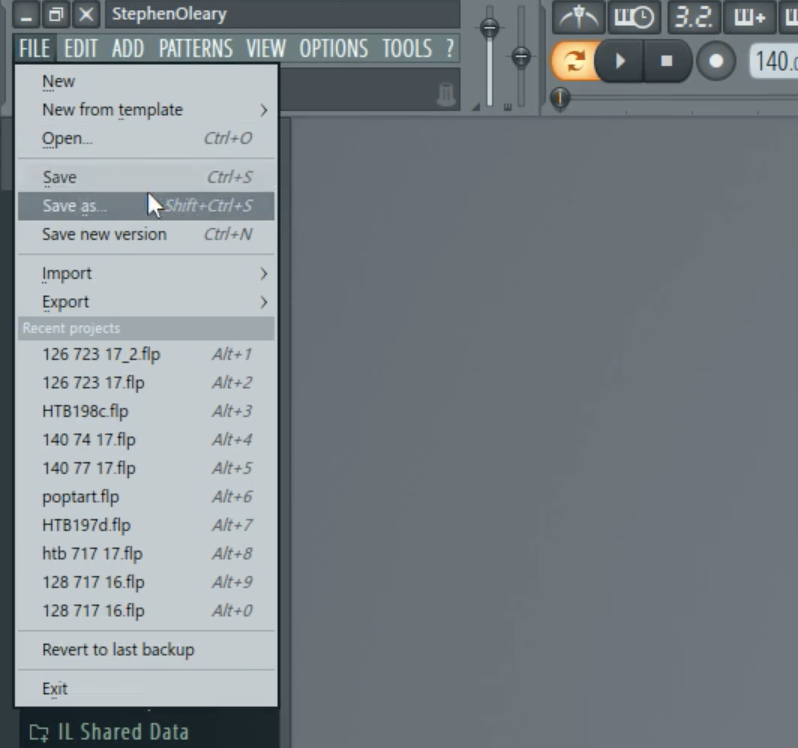
File is an important section in FL Studio. Like most programs, the File tab is where you can create a new project, open a project, save a project, import/export a project, and quickly access recent projects.
While all these operations are standard ones that are easy to use, there is one important button you should know more about.
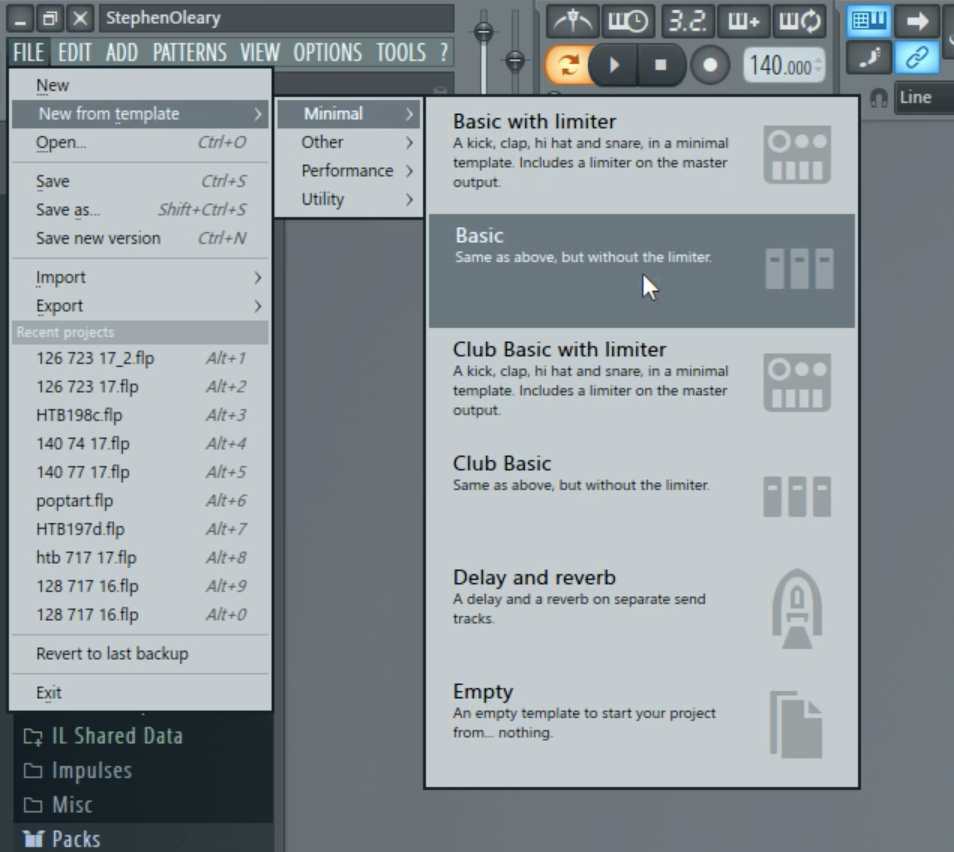
The one we’re referring to is called “New from template”. Clicking this will open an additional window. In this additional window, you can open a blank project with specific pre-determined features.
These pre-determined features include a kick, clap, hi hat and snare and the type of master output you’d like. Each template includes a description, so you can read through the different templates and select the one that best suits your needs.
Since you’ll be using this feature and the others located in the File tab frequently, we’ve laid out some of the hotkeys below for you to memorize:
This way, you’ll be able to save time throughout the creation process. It might not seem like much time, but when you’re constantly using these keys, you’ll be thankful for these shortcuts.
Open = Ctrl + O
Save = Ctrl + S
Save as = Shift + Ctrl + S
Save new version = Ctrl + N
Recent Projects = Alt + 1
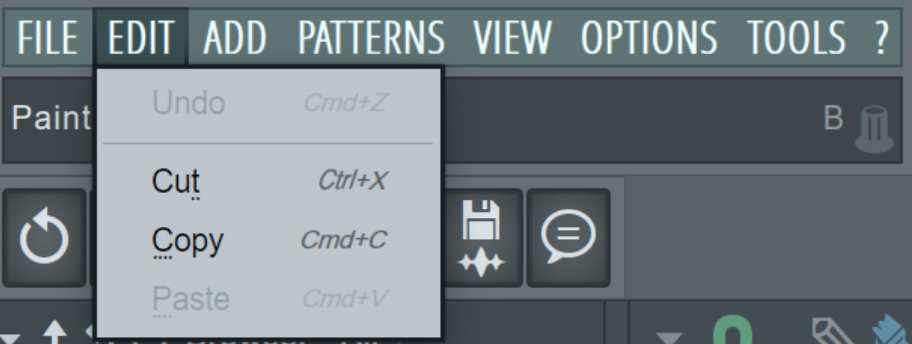
The Edit tab is relatively brief but does contain very important controls. Undo, cut, copy, and paste are all incredibly important tools to use in FL Studio.
Using undo will erase your most recent action, which comes in handy when you make a mistake.
Cutting a selected object ‘cuts’ it off of your screen so that you can paste it somewhere else. You’ll use this often when you feel as though a piece of your track, like a snare or vocal, sounds better in another part of the song. It takes a lot of tries to get your track sounding completely cohesive, so this will be done regularly.
Using the copy function will simply allow you to duplicate a selection. This is great for when you finally create a beat you like and want to spread it throughout the entire track. All you would need to do is simply copy the beat and paste it throughout your song.
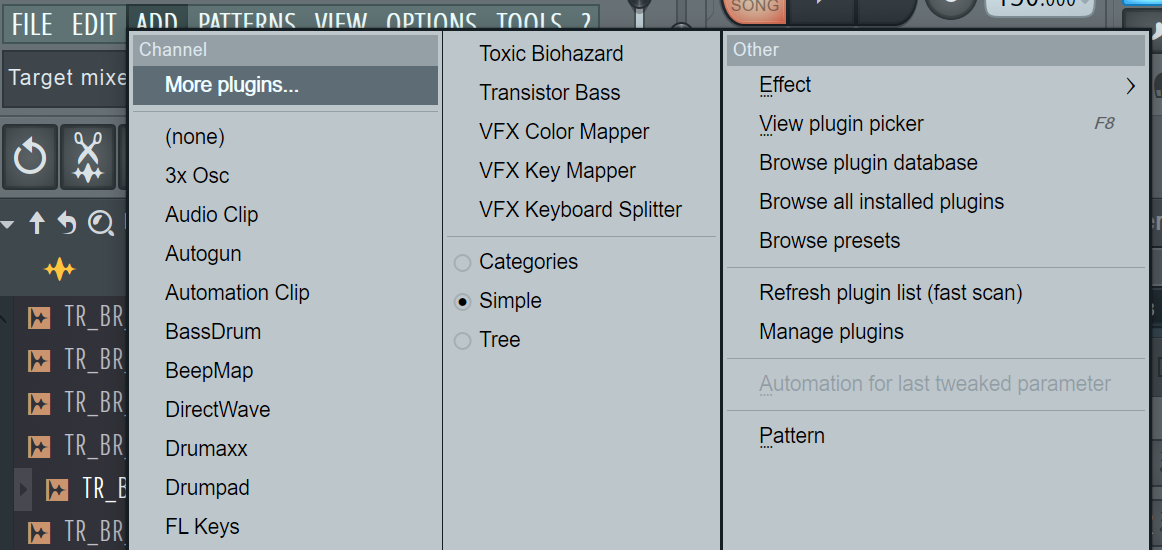
The add menu is very important, because it is where you can select VSTs to add to your composition. In other words, if you want to load a virtual instrument, this is one way you can load VSTs into your project.
Note that you’ll be able to do the same thing by clicking the “+” in the channel rack.
The patterns section will allow you select different patterns that you create from the channel rack, which we will talk more about later in the article.
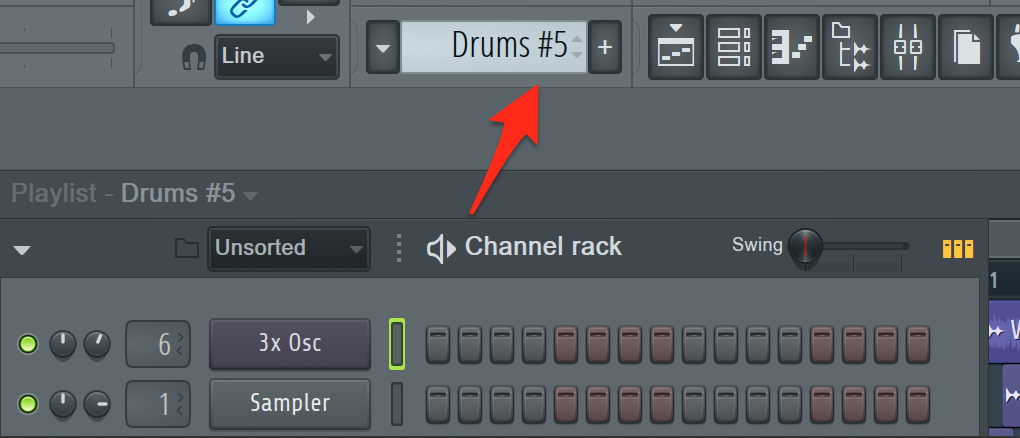
Alternatively, you can select patterns from the drop-down window above the playlist.
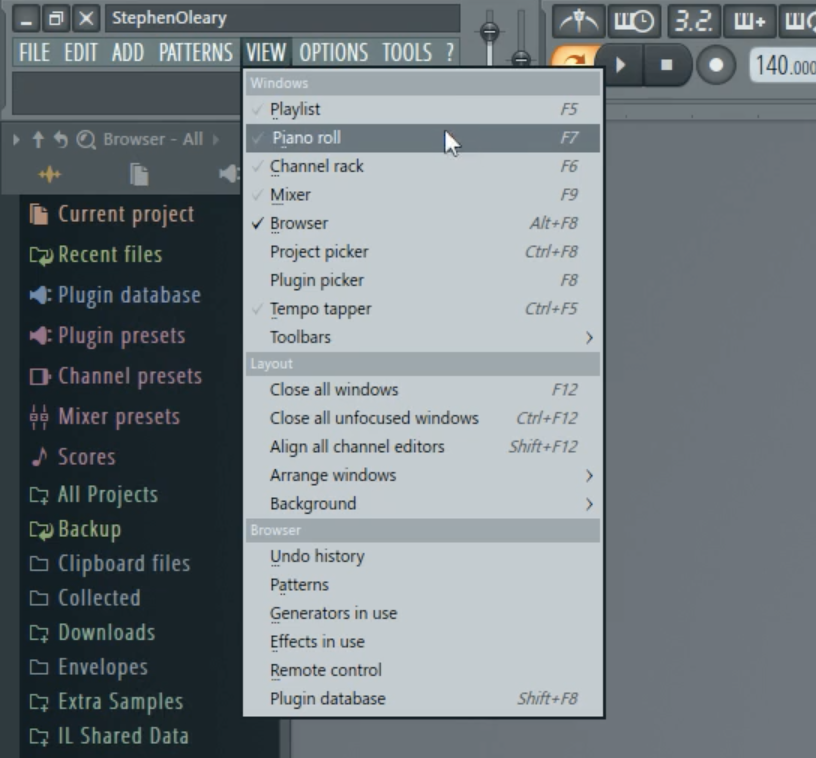
The View tab in FL’s menu bar will allow you to choose which windows are visible. This will help you keep things organized as you’re producing.
The first thing you need to know about this tab is that the windows that are currently open will have a black check mark next to them.
You’ll also notice that there’s a toolbars section in the View tab. This will allow you to select which tools to include in the toolbar. This means you have the ability to remove certain sections from the toolbar should you want to make more room for other tools.
This will further help you stay organized, because you’ll be able to have your most used tools all in one place.
One of the most useful controls in the View section though, is the ability to close all windows. If your CPU starts to overload or things start to lag, simply click “Close all windows” to help things move steadily again!
The hotkey to close all windows is F12.
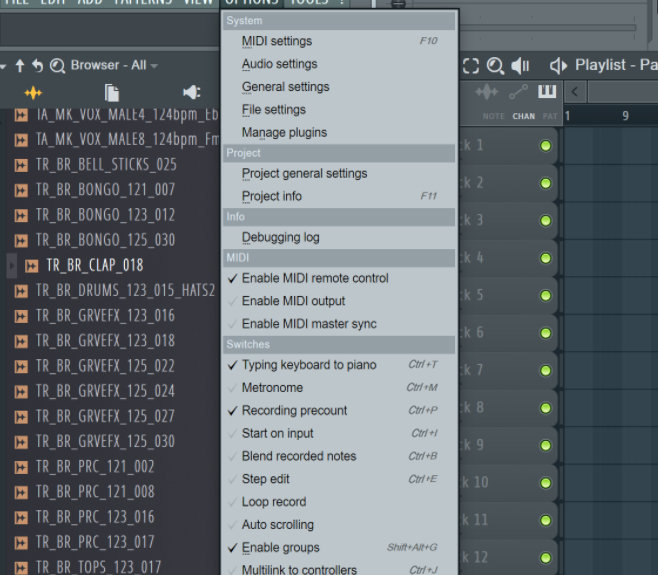
The options tab is where you can configure the settings within your DAW.
The MIDI settings can configure your MIDI devices and which ones are connected, while the Audio settings can control your inputs and outputs and so on.
Be sure to explore these settings to customize your production experience.
In the tools section, one of the most helpful options is the browser smart find.
Clicking this will allow you to search your browser for a specific sample. This is incredibly useful when you know you want a specific sample but can’t remember which folder it is located in.
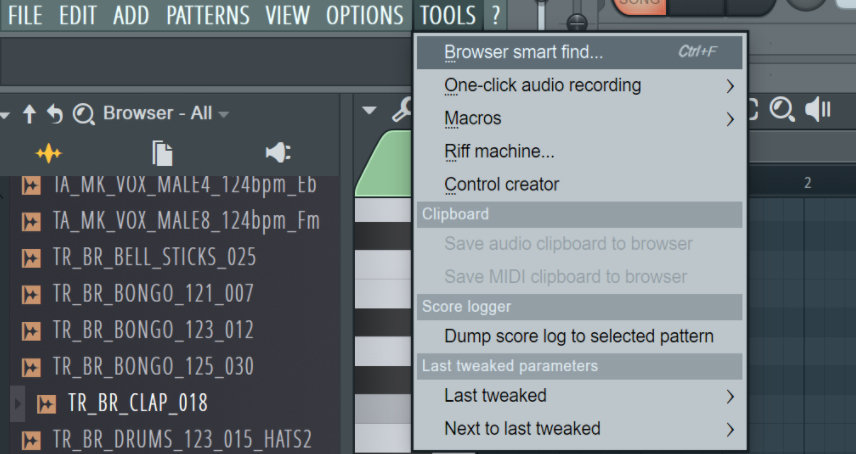
From the tools section, you will also have the ability to quickly set up audio recordings or even create a random a riff melody for some instant inspiration.
The help section will provide you with miscellaneous resources to understand more about your DAW.
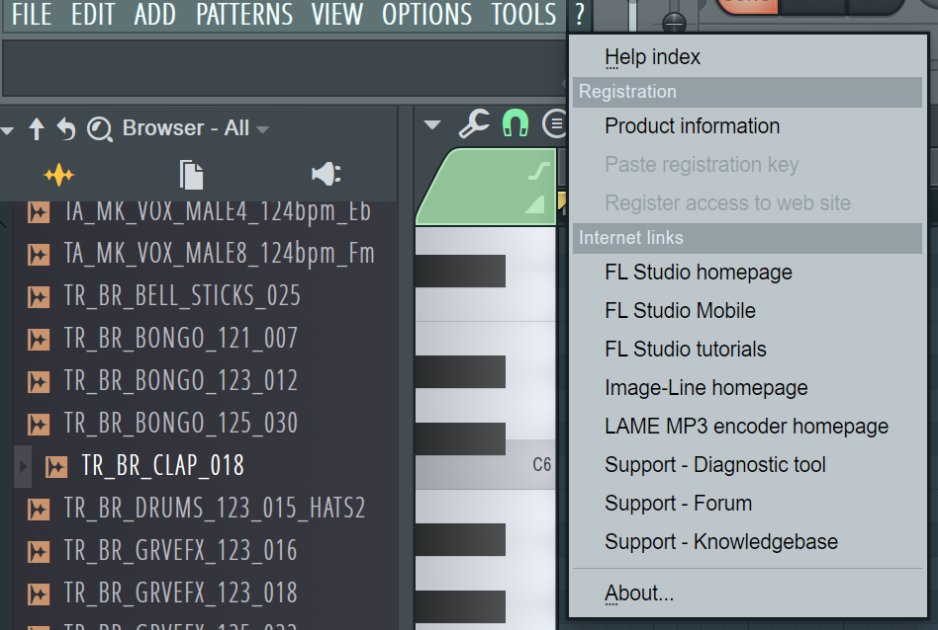
The help index will link you to a web page within Image-line’s reference manual, which will contain the answer to any questions you may have.
Additionally, this is where you can register FL Studio and find links to other various web resources!
Next to the menu bar, you will find other useful tools.
Clicking the button to the left of the play/pause button will allow you to switch between playing a playlist audio or the audio from a pattern.
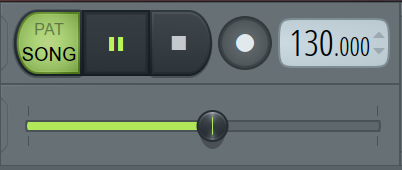
The play button will play/pause your song, and the stop button will set your playhead to the beginning of the playlist. The record button will allow you to record various information, such as MIDI and audio into your DAW.
Just below the play button, the horizontal line will allow you to drag your playhead position to different periods of time in your playlist. This way, if you’re working on one specific portion of your track, you’ll be able to playback only that portion instead of listening to the whole track.
The BPM (beats per minute) can also be adjusted in this section. This will be useful when trying to create a specific genre, which requires a specific BPM.
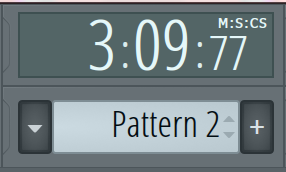
Lastly, the song position box will tell you where the playhead is located in minutes/seconds, or by beats if you click in the window. You’ll use this more than you think if you have a lengthy track (like a full mix) and can’t remember where you last left the playhead at.
Just below it is your pattern picker, which we will explain in more depth later on in the article.
Here in the browser, you will find a multitude of important sections that are useful in creating your music. We will cover the most essential objects located in the browser section.
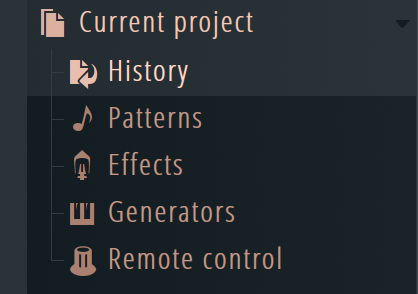
The current project section of the browser will show you the resources and history from the project that is currently open.
By clicking on history, you can see all of the recent changes made in your project. Clicking on one of these will revert the project to the selected history’s data. This way, if you end up liking your first version of the song better, you can just simply restore it.
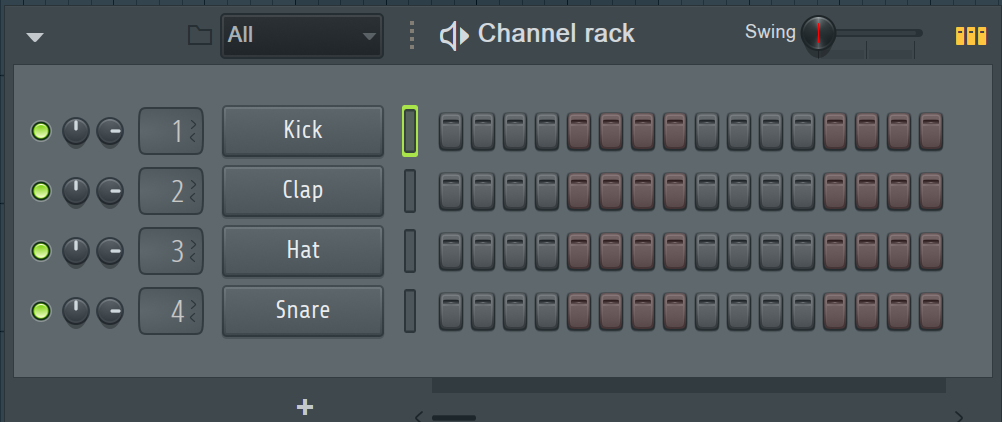
The Channel rack, previously known as the step sequencer, is where you can arrange drums and other sounds.
In its earlier versions, the main focus of FL was its step sequencer, which allowed the user to sequence sounds easily and intuitively.
Over the years, the sequencer has evolved into the channel rack, which is now much more advanced and versatile.
To sequence drums, try clicking on the grey and red buttons. Then play it back to hear what you create!
Each color change from grey to red represents each beat in the time signature. As you can see below, it has four beats. This is considered a 4/4 time signature.
The speaker icon next to “Channel rack” will play your pattern.
You might have seen videos of old pianos that can play music on their own. Those special pianos are fed note information that tell it what keys to play and when.
In today’s digital age, producers can create music in a similar fashion with what is known as a piano roll. Piano rolls allow the user to sequence note information (known as MIDI). This is where you will write all of your melodies, chords, bass lines, etc.
To draw a note, simply click in the piano roll’s window.
Dragging the note up or down will change which key on the piano roll it plays, while clicking and dragging the end of the note left or right will make it shorter or longer.
So where do we begin?
With what seems like a million buttons, getting started can seem intimidating.
But there’s no need to fear! This article will guide you through the menus and tools in FL Studio’s interface, so you can learn everything you need to get started without opening up the manual!
The Menu Bar
The menu bar contains many useful functions and panels. You will find yourself using these windows frequently, so be sure to become familiar with the features and their locations.
File

File is an important section in FL Studio. Like most programs, the File tab is where you can create a new project, open a project, save a project, import/export a project, and quickly access recent projects.
While all these operations are standard ones that are easy to use, there is one important button you should know more about.
The one we’re referring to is called “New from template”. Clicking this will open an additional window. In this additional window, you can open a blank project with specific pre-determined features.
These pre-determined features include a kick, clap, hi hat and snare and the type of master output you’d like. Each template includes a description, so you can read through the different templates and select the one that best suits your needs.

Since you’ll be using this feature and the others located in the File tab frequently, we’ve laid out some of the hotkeys below for you to memorize:
This way, you’ll be able to save time throughout the creation process. It might not seem like much time, but when you’re constantly using these keys, you’ll be thankful for these shortcuts.
Open = Ctrl + O
Save = Ctrl + S
Save as = Shift + Ctrl + S
Save new version = Ctrl + N
Recent Projects = Alt + 1
Edit
The Edit tab is relatively brief but does contain very important controls. Undo, cut, copy, and paste are all incredibly important tools to use in FL Studio.
Using undo will erase your most recent action, which comes in handy when you make a mistake.
Cutting a selected object ‘cuts’ it off of your screen so that you can paste it somewhere else. You’ll use this often when you feel as though a piece of your track, like a snare or vocal, sounds better in another part of the song. It takes a lot of tries to get your track sounding completely cohesive, so this will be done regularly.
Using the copy function will simply allow you to duplicate a selection. This is great for when you finally create a beat you like and want to spread it throughout the entire track. All you would need to do is simply copy the beat and paste it throughout your song.

The add menu is very important, because it is where you can select VSTs to add to your composition. In other words, if you want to load a virtual instrument, this is one way you can load VSTs into your project.
Note that you’ll be able to do the same thing by clicking the “+” in the channel rack.

Patterns
The patterns section will allow you select different patterns that you create from the channel rack, which we will talk more about later in the article.
Alternatively, you can select patterns from the drop-down window above the playlist.

View

The View tab in FL’s menu bar will allow you to choose which windows are visible. This will help you keep things organized as you’re producing.
The first thing you need to know about this tab is that the windows that are currently open will have a black check mark next to them.
You’ll also notice that there’s a toolbars section in the View tab. This will allow you to select which tools to include in the toolbar. This means you have the ability to remove certain sections from the toolbar should you want to make more room for other tools.
This will further help you stay organized, because you’ll be able to have your most used tools all in one place.
One of the most useful controls in the View section though, is the ability to close all windows. If your CPU starts to overload or things start to lag, simply click “Close all windows” to help things move steadily again!
The hotkey to close all windows is F12.
Options
The options tab is where you can configure the settings within your DAW.
The MIDI settings can configure your MIDI devices and which ones are connected, while the Audio settings can control your inputs and outputs and so on.
Be sure to explore these settings to customize your production experience.

Tools
In the tools section, one of the most helpful options is the browser smart find.
Clicking this will allow you to search your browser for a specific sample. This is incredibly useful when you know you want a specific sample but can’t remember which folder it is located in.

From the tools section, you will also have the ability to quickly set up audio recordings or even create a random a riff melody for some instant inspiration.
? (Help)
The help section will provide you with miscellaneous resources to understand more about your DAW.

The help index will link you to a web page within Image-line’s reference manual, which will contain the answer to any questions you may have.
Additionally, this is where you can register FL Studio and find links to other various web resources!
Toolbar Panels
Next to the menu bar, you will find other useful tools.
Clicking the button to the left of the play/pause button will allow you to switch between playing a playlist audio or the audio from a pattern.

The play button will play/pause your song, and the stop button will set your playhead to the beginning of the playlist. The record button will allow you to record various information, such as MIDI and audio into your DAW.
Just below the play button, the horizontal line will allow you to drag your playhead position to different periods of time in your playlist. This way, if you’re working on one specific portion of your track, you’ll be able to playback only that portion instead of listening to the whole track.
The BPM (beats per minute) can also be adjusted in this section. This will be useful when trying to create a specific genre, which requires a specific BPM.

Lastly, the song position box will tell you where the playhead is located in minutes/seconds, or by beats if you click in the window. You’ll use this more than you think if you have a lengthy track (like a full mix) and can’t remember where you last left the playhead at.
Just below it is your pattern picker, which we will explain in more depth later on in the article.
The Browser
Here in the browser, you will find a multitude of important sections that are useful in creating your music. We will cover the most essential objects located in the browser section.
Current Project
The current project section of the browser will show you the resources and history from the project that is currently open.
By clicking on history, you can see all of the recent changes made in your project. Clicking on one of these will revert the project to the selected history’s data. This way, if you end up liking your first version of the song better, you can just simply restore it.

The Channel Rack
The Channel rack, previously known as the step sequencer, is where you can arrange drums and other sounds.
In its earlier versions, the main focus of FL was its step sequencer, which allowed the user to sequence sounds easily and intuitively.
Over the years, the sequencer has evolved into the channel rack, which is now much more advanced and versatile.
To sequence drums, try clicking on the grey and red buttons. Then play it back to hear what you create!
Each color change from grey to red represents each beat in the time signature. As you can see below, it has four beats. This is considered a 4/4 time signature.
The speaker icon next to “Channel rack” will play your pattern.

The Piano Roll
You might have seen videos of old pianos that can play music on their own. Those special pianos are fed note information that tell it what keys to play and when.
In today’s digital age, producers can create music in a similar fashion with what is known as a piano roll. Piano rolls allow the user to sequence note information (known as MIDI). This is where you will write all of your melodies, chords, bass lines, etc.
To draw a note, simply click in the piano roll’s window.
Dragging the note up or down will change which key on the piano roll it plays, while clicking and dragging the end of the note left or right will make it shorter or longer.
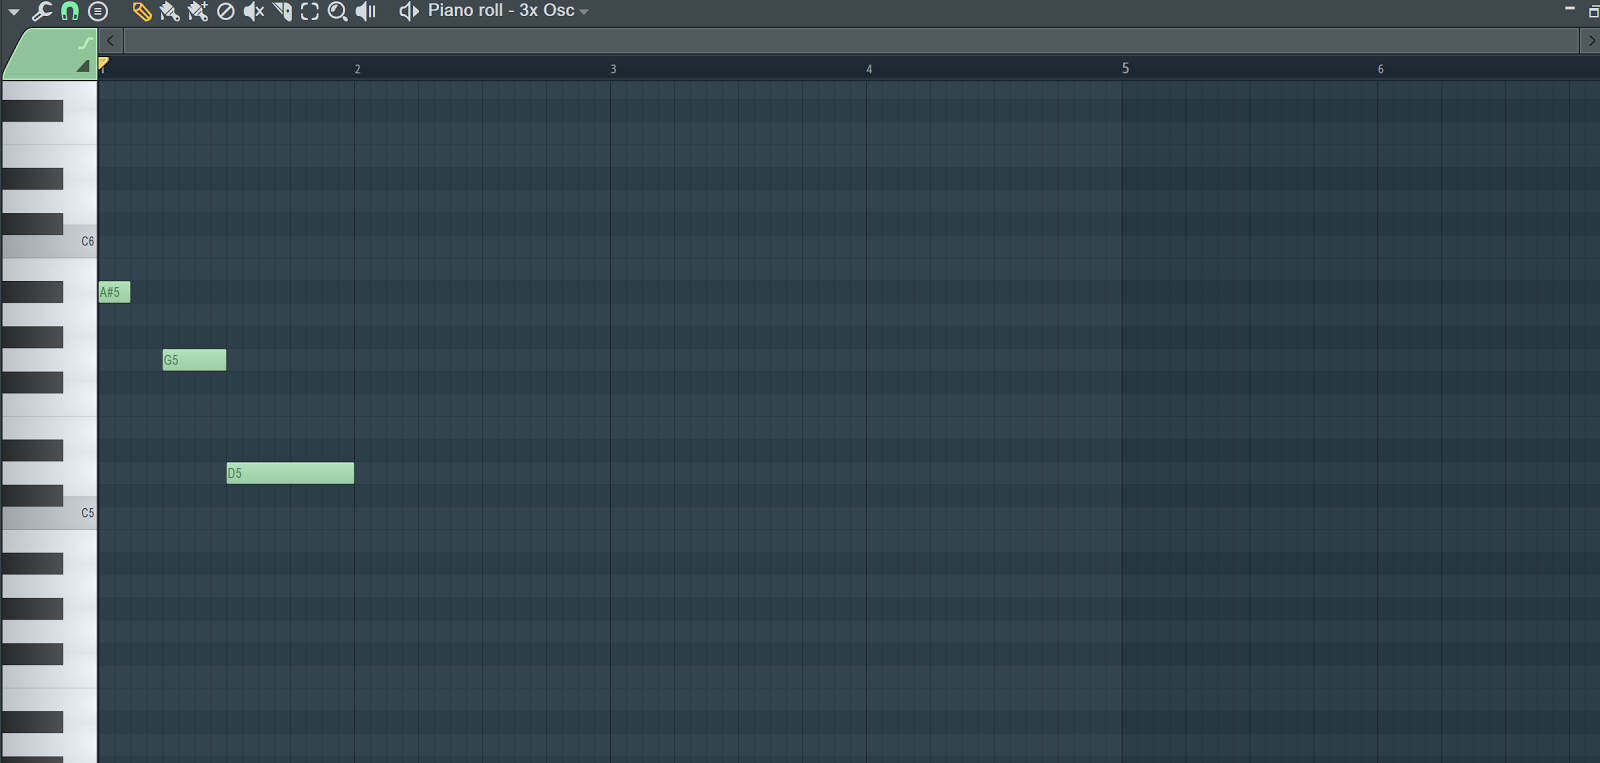
Double-clicking a note will allow you to change its pan, volume, release, and even its numerical duration.
From the main menu drop-down menu, you can open MIDI files, export note information, create arps, generate ghost notes, and much more.
Take a look at the drop down menu and play around with the settings until they are configured to your liking!
To delete a note, simply give it a right click. Alternatively, you can select groups of notes with the select tool and hit your delete key to remove a large portion of notes at once.
The Playlist
The playlist is the last section that we will cover to help you get started with FL Studio.
In this section of the DAW, you will lay out all of the elements of your track.
very nice post
ReplyDeletelike your blog
ReplyDeleteLots of relevant info on this post.
ReplyDeleteSkel.Now i would try to make some sick beats with this app=)
ReplyDelete